TLDR; I set up a GitHub repo for my learning project to build an End-to-End Analytics Platform. Used a GitHub project as reference (Atom). Cloned my repo with VS Code. Closed the loop with the GitHub Flow by creating an issue (GitHub Guides – Mastering Issues), then a branch, changed/commit stuff, pushed changes, created a pull request, merge the changes. Found an exciting learning tool (GitHub Lab | How it works), project (GitHub Training Kit), and VS Code GitHub integration along the way.
As part of my series on learning to build an End-to-End Analytics Platform project I want to start To get started here are a few things I want to get set up:
- README.md – project on a page 📄.
- .gitignore file – ignores files starting with VS Code using the gitignore extension.
- docs folder – using this to store documents related to the project.
- src folder – planning to use this as the root folder for code in the repo.
- test folder – planning to use this as the root folder for unit tests.
- actions folder – as far as I can tell at the moment for GitHub action-related files.
- GitHub Project – using this to track my
workissues over time.
How did I figure out that’s how I wanted to setup the repo you ask? I took my inspiration from the atom/github: Git and GitHub integration for Atom repository. Why? Well, I am starting my learning for GitHub through a LinkedIn Learning course Learning GitHub and that was the repo showcased in intro videos.
When I grow up I’ll work on using an approach outlined by Rob Sewell who has a fabulous beard, and some next-level skills: How to fork a GitHub repository and contribute to an open source project – Rob Sewell – SQLDBAWithABeard. For now, no forking the repo. The plan is to use VS Code in with my development environment setup to clone the repo locally, setup a new remote/local branch to get into the swing of feature branching, then make the changes are complete a very simple pull request.
Creating and cloning repo was easy enough using VS Code. Now I didn’t do everything in VS Code purely because I want to get a used to a few things first. So I manually grabbed the Clone URL from the GitHub repo.

All by the book so far. I opened up the Command Palette with Ctrl+Shift+P. Start typing ‘git clone’ and select the ‘Git: Clone’ operation.

Pasted in the repo URL.

I was prompted to choose an repository location to clone the repo to. I chose to go with a folder that I can use for future repos, something like <your path>\github\<your repo>. Once that’s done, we get prompted to open up the repo.

Great! Repo has been cloned locally and the files are there. Local repository has been initialised and we are on the local main branch (see bottom left).

Side note: I set a local repo user configs aligned with the user name and email to be used by git for committing to my remote GitHub repo:
git config --local user.name 'example'
git config --local user.email 'example@domain.com'
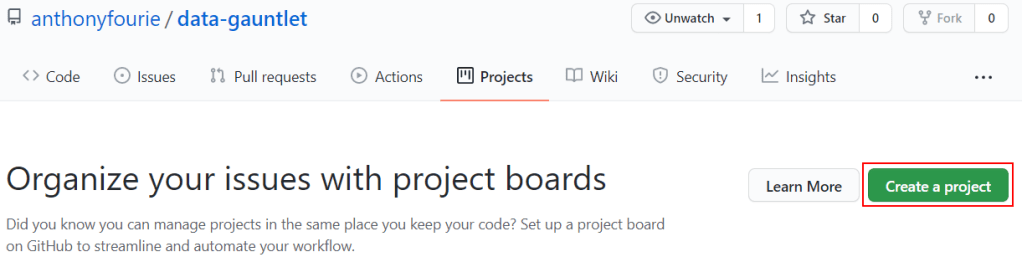
Before creating feature branches I want to track my work for updating the project structure and the documentation. To do that we create a ‘Project Board‘:
Give it a name, description, and if you want to use a template go for it. I opted for a ‘basic kanban’ project template. As I go a long learning how all the triggers and things work this will evolve to something more sophisticated.
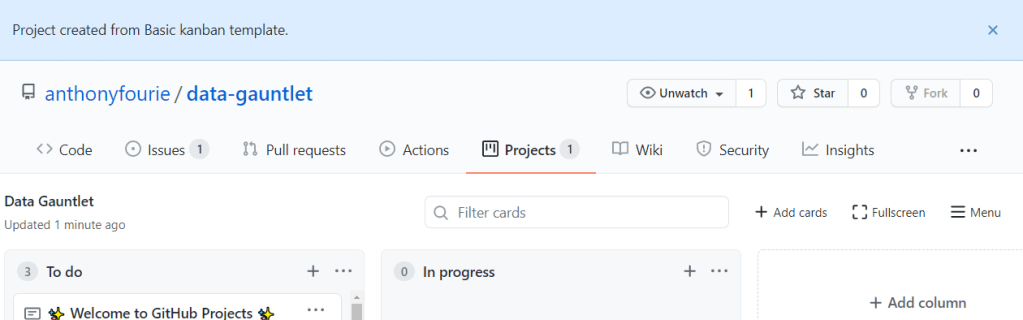
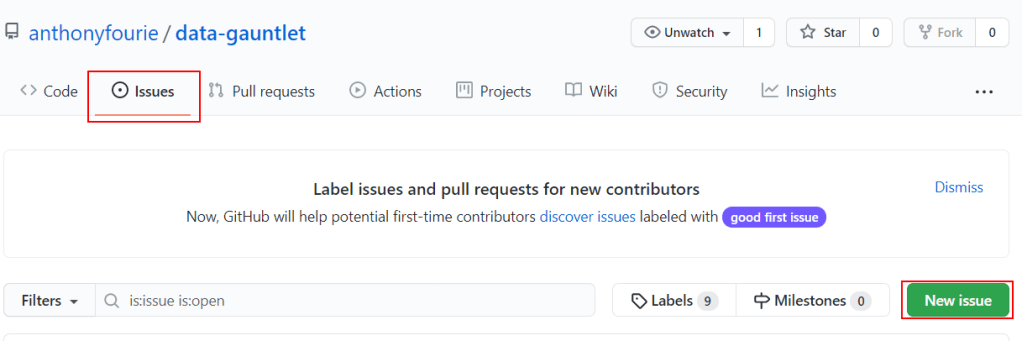
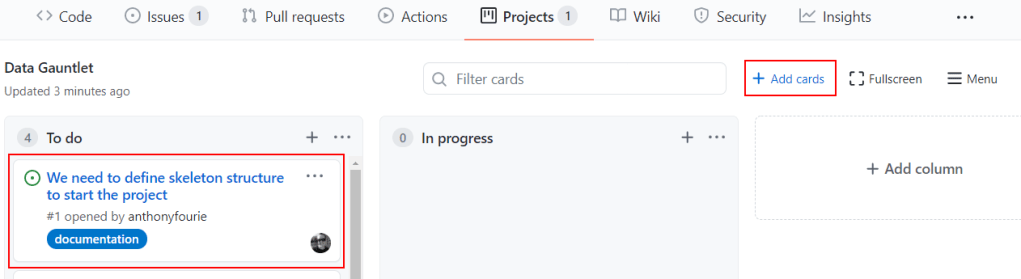
It’s beginning to take shape, nice! Once that is done I need to add a work item to track my work against, to do that we create an ‘Issue‘:
Fill it with information. Assign it to myself. Then label it with a ‘documentation’ label. Then hit the ‘Submit new issue’ button. Awesome. We now have an new issue that we can discuss, subscribe to for notifications, assign to projects, milestones, and more.
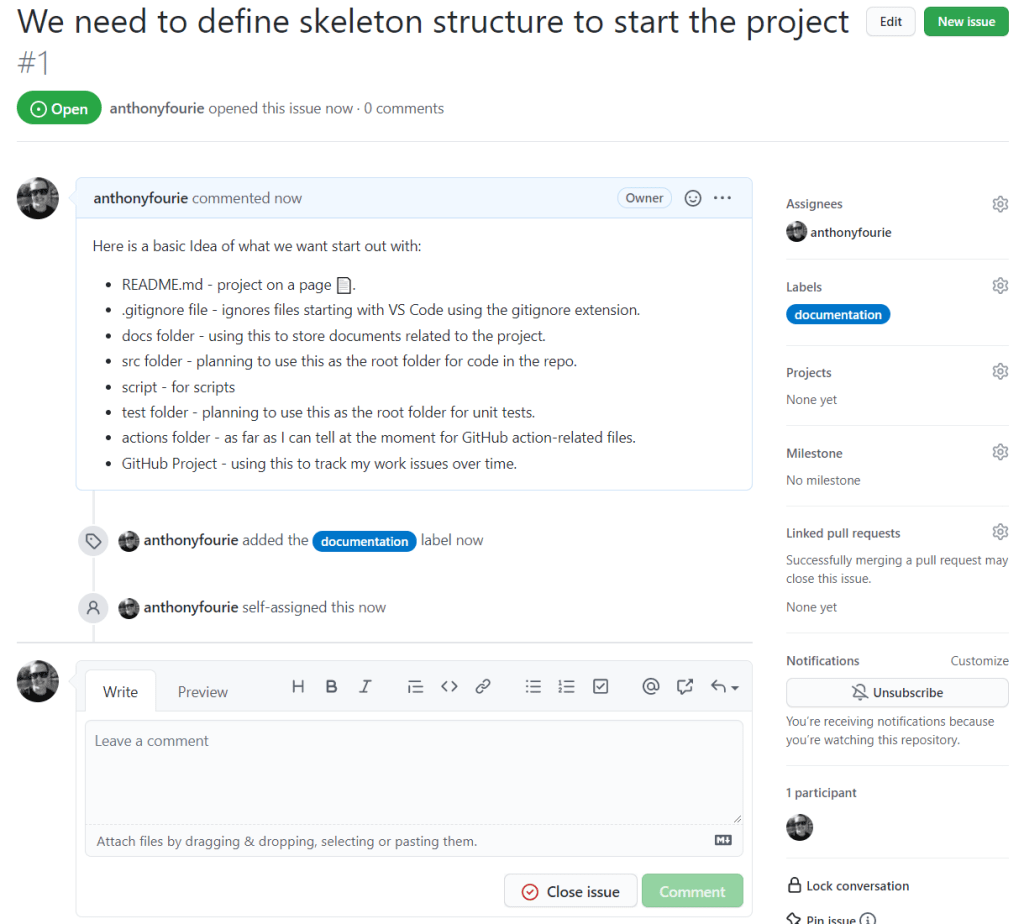
Once the issue is logged, I jumped over to the Project Board and added the ‘card’ to the ‘To Do’ swim lane. Now it automatically links up to this project.
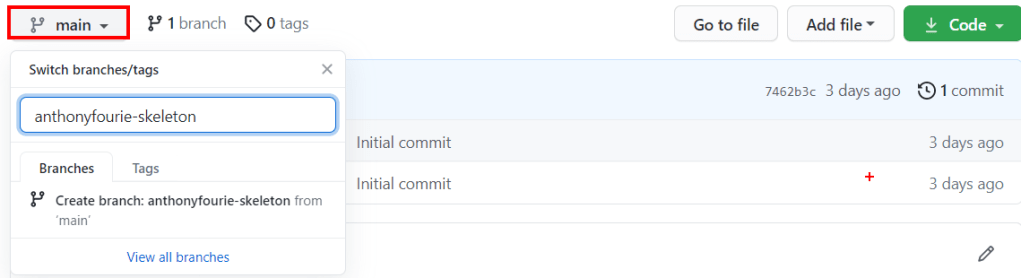
Switching over to the Code tab, we create a branch from the main branch in GitHub so that we can make our changes to that branch.
Once the branch is created we need to sync our local repo with a Git Pull to get the latest changes one of which is the addition of the new branch. The next point is to switch to or ‘check out’ that branch we just created. Opening up the Command Palette with Ctrl+Shift+P. Start typing ‘git checkout’ and select the ‘Git: Checkout to..’ operation. Then the feature branch you want to switch to.

Next up. Make changes.
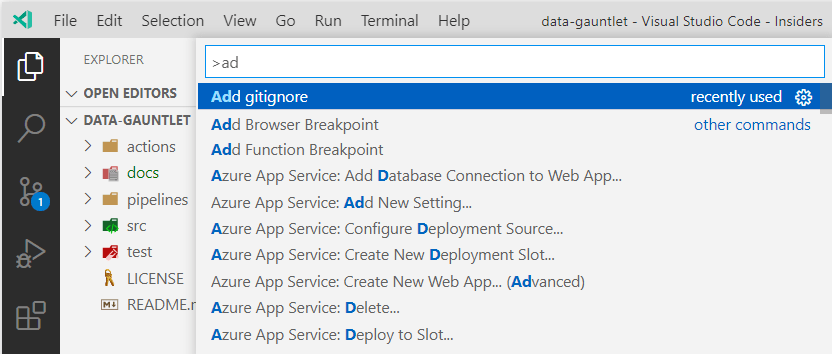
I added all the files and folders that I mentioned earlier. A noteworthy mention though was adding a .gitignore file using the gitignore extension which pulls .gitignore templates from the https://github.com/github/gitignore repository. Awesome. Didn’t know there was a repo full of .gitignore templates.

Opening up the Command Palette with Ctrl+Shift+P. Start typing ‘add gitignore’ and select the ‘Add gitignore’ operation.
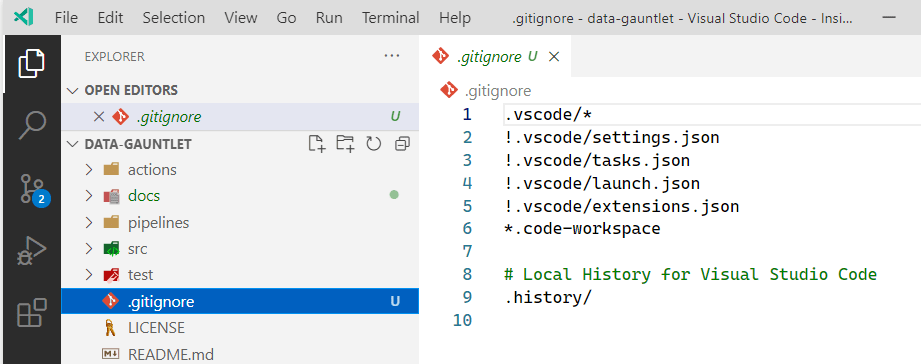
Then just choose a template. In my case that’s ‘VisualStudioCode’.

Nice! That was pretty easy.
Next up push it up remote. Using the menu in the left, I switched to the Source Control view (Ctrl+Shift+G). Added a commit message. Then hit the commit button. In my case I went for the ‘stage all changes and commit them directly‘ option.
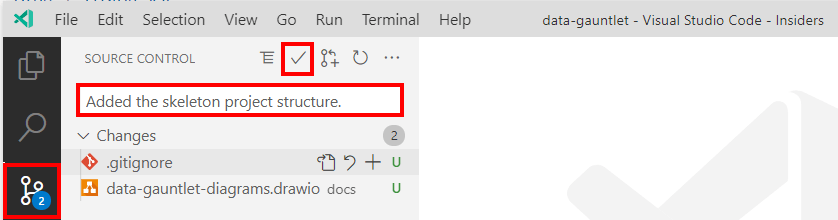
Now notice at the bottom of the screen in the status bar we can see we have a change waiting to be pushed to the remote repository in GitHub.

Just click on that. Follow the prompts and VS Code will push your changes up to the remote repository. In future with branches we will follow this up with a pull request.
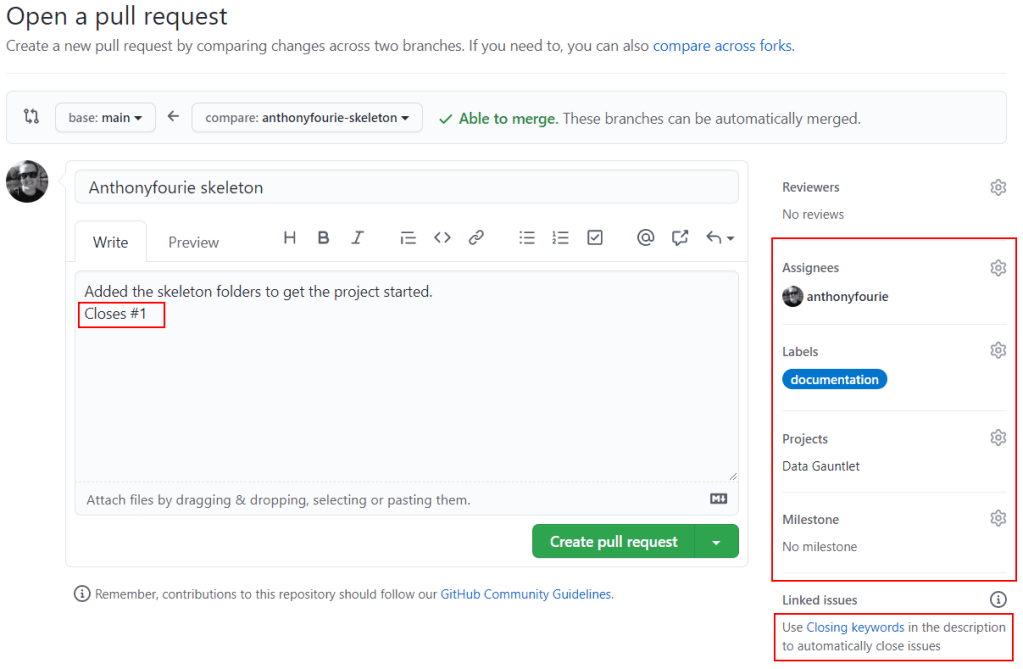
Once that’s done, we jump back to GitHub and we can see our branch is updated with the files we added. Next step is to finish of the flow by creating a Pull Request and merging our changes back into the main branch. To start that process we click on the ‘Compare & pull request’ button.

As part of the pull request we fill in as much information as we can and link any issues that we want to close automatically using keywords. Once we filled everything out and we are happy there are no conflicts, we can click on the ‘Create pull request’ button.
We get a valuable amount of rich history related to the work we have done here. Looking through the details I see I have no conflicts either. Let the merge begin.
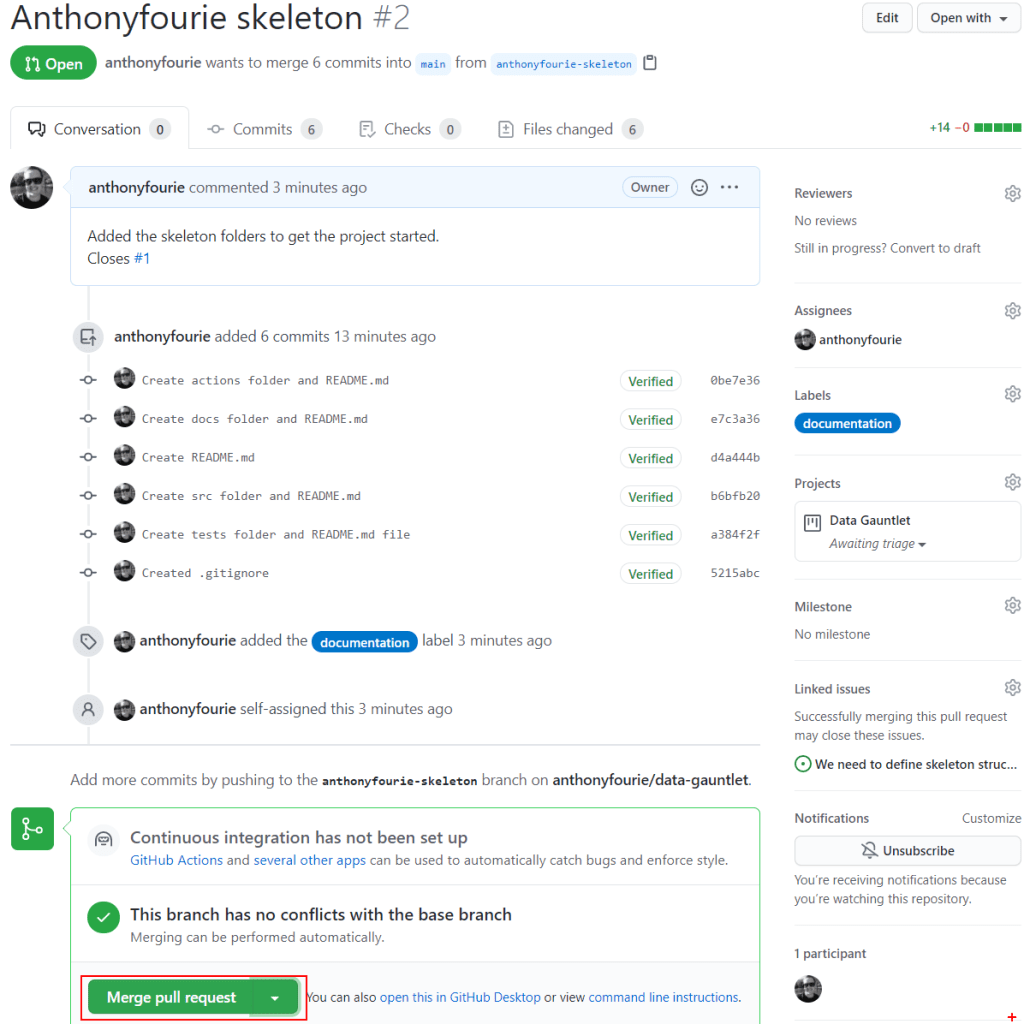
The merge is successful. In this case the work I have done on the ‘anthonyfourie-skeleton’ branch is complete. I don’t need that branch anymore so I am going to delete it.

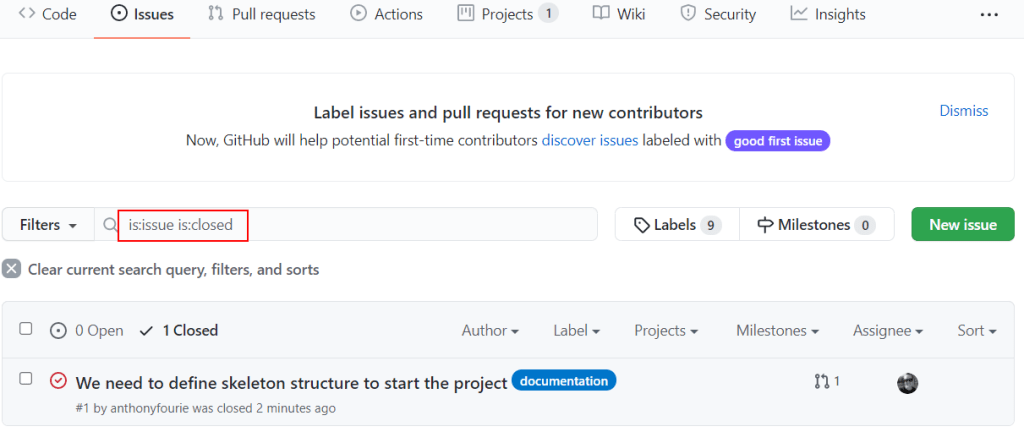
That’s it! Flipping back to the Issues tab we can see our issue has been closed. Whoop there it is!
All in all I think that was a pretty good start. Looking forward to the next post where I think I will tackle spinning up some basic infrastructure by using infrastructure as code.
🐜
